How to Change Bandsaw Blades?

Why Do Bandsaw Blades Break?
March 10, 2022Why Bandsaw Blade Lubricant is Essential In Sawing?
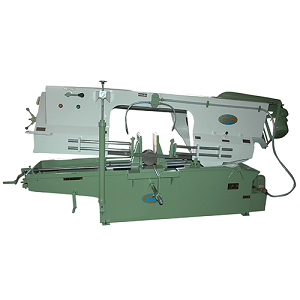
March 15, 2022How to Change Bandsaw Blades?
In the accompanying step-by-step process, figure out how to change your bandsaw blade as well as how to make the changes important to keep your bandsaw blade cutting appropriately.
Open the Cabinet
The initial step to changing your bandsaw blade is to detach the unit from power. The last thing you need to happen is for the unit to incidentally turn on while you’re changing the blade. Whenever you’ve detached the power, open up the top and base cupboards, uncovering the two tires between which the bandsaw blade is fixed. Clear out any inordinate sawdust or chips, to make the occupation of changing the blade simpler.
Loosen the Blade Tension
When you have the bandsaw bureau opened and somewhat clean of sawdust and hindrances, the subsequent stage is to relax the blade strain. Find the pressure handle on top of the bandsaw, which normally is on an upward shaft over the bandsaw’s top bureau. Relax the strain on the blade by turning the handle until the blade is free and malleable.
Raise the Bandsaw Blade Guard
When the pressure on the bandsaw blade is eliminated, and the blade is free, the following stage to changing the blade is to raise the bandsaw blade watch. This watchman slides all over a track and is intended to be changed while cutting load of different thicknesses. The blade gatekeeper should generally be in the most reduced position conceivable without slowing down the stock, to hold the blade back from avoiding. To raise the gatekeeper, turn the fixing handle found at the highest point of the watchman on the posterior of the top bureau. Slide the watchman up to the most noteworthy position, and fix the handle to keep it secure.
Eliminate the Rear Blade Guard
When the bandsaw blade is free and the front gatekeeper has been lifted, the subsequent stage in changing a bandsaw blade is to eliminate the back blade watch. This blade monitor covers the blade as it voyages upwards from the base level to the top level, and safeguards the administrator in case of blade breakage. To eliminate this blade monitor, essentially eliminate the screws that hold the blade watch set up. Commonly, a Phillips screw on the top and lower part of the watchman ties down the gatekeeper to the undercarriage. Put the gatekeeper and screws away for the present.
Loosen the Under-Table Blade Guard
Subsequent to eliminating the back blade watch, the following stage to changing a bandsaw blade is to slacken the under-table watchman. There are normally a couple of squares and change wheels found under the table, as well as a fold-over gatekeeper to assist with keeping the blade set up in case of breakage or then again assuming the blade were to fallen off course.
To get to this blade monitor, pop off the plastic place from the center of your saw table with a screwdriver, and put this middle away. Then, at that point, gaze down into the opening and find the screw that holds the defensive fold-over monitor set up. Relax the screw that holds the gatekeeper set up, then, at that point, pivot the watchman 180-degrees until it is far removed.
Eliminate the Bandsaw Blade
With all of the bandsaw blade watches eliminated or securely far removed, you may now eliminate your bandsaw blade. Get the blade close to the top wheel, as displayed in the picture above. Remove the blade from the two following tires, and turn it 90-degrees so the blade’s teeth are highlighting your right. Guide the blade through the space in the saw table, until it is clear of the bandsaw totally. Whenever you’ve eliminated your blade, it is really smart to overlap the bandsaw blade in thirds and tie the blade together for capacity. Practice alert while collapsing your blade, as can spring out as you’re collapsing, which can cause a dreadful cut.
Slide in a New Bandsaw Blade
After the old bandsaw blade is eliminated, you can start introducing the new bandsaw blade. Slide the blade through the space in the saw table likewise to the way that you eliminated the old blade. When the blade is through the space and in the middle pattern of the table, pivot the blade and spot it over the top and base tire. Focus the blade over the focal point of every one of the two tires, and start fixing the tensioning handle on the highest point of the bandsaw, to stand firm on the blade in the situation. Don’t over-fix, especially in the event that you’re going from a tiny blade to an extremely huge one or the other way around.
Adjust the Bandsaw Guide Blocks
Before you can start to genuinely strain and change the following on your new bandsaw blade, you’ll have to release the bandsaw guide squares and rollers that keep the blade following appropriately. There are ordinarily two arrangements of these aide squares and rollers: one set is found in the sliding blade watch over the table, and the other set is found underneath the table.
Release the set screw that holds the square on one or the other side of the blade on the sliding watchman over the table. The squares should slide uninhibitedly left or right, either toward or away from the blade. Then, at that point, relax the set screw and pivot the back roller in reverse, away from the back of the blade. Rehash the progression for the arrangement of squares and roller under the table.
Tension the Bandsaw Blade
After the aide squares and rollers are far removed, the following stage to introducing a bandsaw blade is to apply the appropriate measure of pressure to the blade. Verify that the blade is following appropriately in the focal point of the tires, then, at that point, start fixing the tensioning handle. While fixing the pressure change handle, pivot the top bandsaw wheel, meanwhile watching to see that the blade tracks in the focal point of the tire on the wheel. On the off chance that the blade is following excessively far forward or to the back, find the following change handle toward the rear of the bandsaw’s upper bureau. Pivot the following handle somewhat as you turn the wheel, and notice the distinction in the focusing of the blade. Continue changing the following handle until the blade rides impeccably focused on the tire. Remember that a minor change in accordance with the following handle can mean a colossal distinction in how the blade tracks on the tire, so make your acclimations to the following handle extremely unobtrusive.
When the blade is following appropriately, look on the rear of the saw’s upper bureau for a tensioning measure, for example, the one displayed in the picture above. Change the strain on the blade until the measure’s pointer is situated for the appropriate blade thickness. A more extensive blade will require more strain than a more slender blade, yet the pointer ought to have proper imprints for each famous blade size. When the blade is appropriately tensioned and followed in the focal point of the tires, it is a fun opportunity to be certain that the bandsaw table is square to the blade. Put a mix square on the table, and adjust the contrary edge of the square with the side of the bandsaw blade. On the off chance that the blade isn’t totally square to the table, relax the table change handles under the table, and change the point of the table until it is square to the blade. Fix the handles to get the table ready.
Position the Guide Blocks
With the blade appropriately tensioned and following on the focal point of the tires, the subsequent stage is to re-position the aide squares and rollers. Start by turning the under-table blade watch once again into the right spot, and fixing the screw that gets the gatekeeper. Then, change the lower obstructs so they are barely short of contacting each side of the blade. Fix the set screws to hold the squares set up.
Then, at that point, change the forward position of the squares so the squares are riding simply behind the teeth, on the level piece of the blade. You might have to re-change the place of one or the other square after this change. Then, change the place of the back roller, so it is riding simply behind the blade. Fix every one of the set screws to secure the aides, then, at that point, pivot the haggle how the bandsaw blade tracks through the squares and rollers. On the off chance that the squares and rollers guide yet don’t contact the blade, you’ve situated them accurately.
Re-introduce the spacer in the opening in the focal point of the table, prior to continuing on to the top aide blocks. Bring down the blade defenses most of the way toward the table, and rehash the square and roller change steps that you utilized for the aides under the table. Additionally, this present time would be a decent opportunity to re-introduce them back blade watch you eliminated in step 5.
Test the Bandsaw Blade Tracking
With the blade following fixated on the tires while turning the wheels the hard way, and with the aide squares and rollers appropriately situated, the last advance to introducing your new bandsaw blade is to connect the saw and turn it on. Watch the following of the blade across the tires, and tune in for restricting on the aide blocks. Assuming you see or hear any proof of inappropriate situating of the aide squares or rollers, or on the other hand in the event that the blade isn’t following in the tire, switch off the saw, turn off it from power, and make the fitting changes. Whenever happy with the changes, close the top and base cupboards, bring down the blade defenses to the fitting stature, and start utilizing your bandsaw.
Read more about Why Do Bandsaw Blades Break?